Setting up a proxy server is one of the most critical aspects in Android security. A proxy server acts as an intermediary between your device and the internet. It offers various benefits, such as bypassing website restrictions, improving connection speeds, and safeguarding personal data when using public Wi-Fi networks.
Table of Contents
When connected to a proxy, all internet requests from your device are routed through the proxy server. This can modify your IP address and other connection details, allowing you to browse anonymously and securely.
This post provides the complete step-by-step guide on the process of setting up a proxy server on Android devices.

Why Learn to Set Up a Proxy Server?
Understanding how to configure a proxy server can be highly beneficial for several reasons:
- Anonymity and Access
Changing your device’s IP address helps maintain anonymity online and access geo-restricted websites. - Improved Performance
Proxies can enhance internet speeds by reducing response times when accessing remote servers. - Traffic Control
Configuring a proxy gives you greater control over internet traffic, allowing you to optimize device performance and enhance browsing security. - Essential for Connectivity
In certain cases, proxies may be the only available option for connecting to the internet
Setting Up a Proxy for 3G and 4G Networks
There are several methods to configure a proxy on Android when using mobile data:
- Manual Configuration
- Access the mobile internet settings on your device.
- Locate the proxy settings within the APN (Access Point Names) section.
- Enter the required proxy server details.
- Wi-Fi Proxy Setup
- Connect to a Wi-Fi network.
- Manually configure the proxy in the system settings or web browser.
- Browser-Specific Setup
- Certain web browsers allow proxy settings to be adjusted directly within their options.
- Proxy Management Apps
- Use specialized apps for more advanced proxy configuration and management.
How to Set Up a Proxy on Android for Wi-Fi
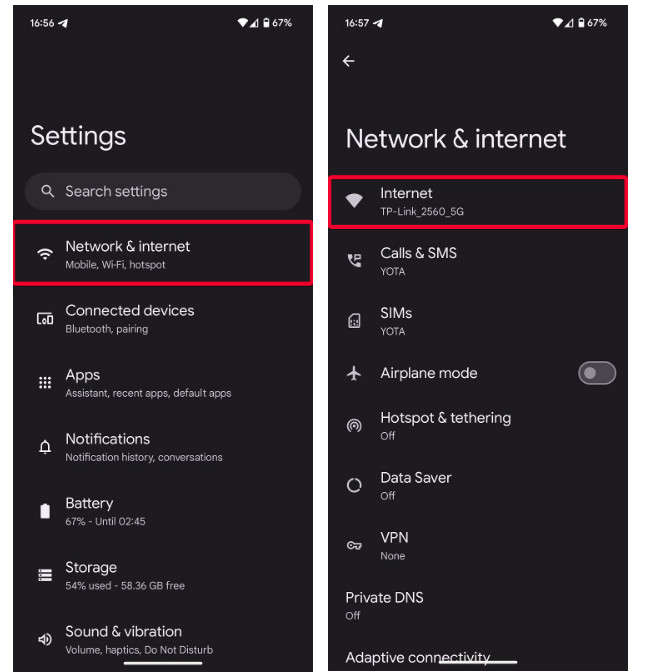
Go to your device’s Wi-Fi settings and select the network you’re connected to.

Tap the network name to access Advanced Settings.

Locate the Proxy option and choose Manual.

Enter the proxy server information, including the address, port, and any required credentials.
Confirm and save the changes.
How to Disable a Proxy on Android
- Open your device’s Settings.
- Navigate to the Network & Internet or Wi-Fi section.
- Select the active Wi-Fi network where the proxy was configured.
- Tap the network name or arrow to open Advanced Settings.
- In the Proxy section, choose None or Do not use proxy.

Save your changes.
Final Words on Setting Up a Proxy Server
Properly configuring a proxy server on Android can enhance your browsing experience by improving security, bypassing restrictions, and boosting connection speeds.
For the best results, use a reliable proxy provider like Belurk Android. Belurk offers a wide range of high-speed dedicated proxies that ensure secure and stable internet access. Plus, their technical support team is always available to assist with any questions or issues. Stay anonymous and protected with Belurk!


